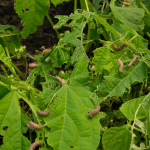
Kitchen scrap gardening is a must for those looking to live frugal. As the world gets more expensive and things gets more processed, it’s an act of radical rebellion to grow your own food. Anything that makes your grocery bill smaller while helping to plump up your meals is a win in my book!
Throwing away food scraps is also simply wasteful. You could start a compost heap, regrow them as we’re doing here, or even throw them out for wildlife, but the last thing you should do is toss them in the bin. If nothing else, start a worm farm!
That said, if you have counter space, access to a container and water, and some patience, you can make your produce purchases last a lot longer.
Finally, one of my favorite benefits of kitchen scrap gardening is making healthy (but expensive) organic fruits and veggies go the extra mile. Buying organic romaine might cost a few dollars more, but if you regrow it a few times, it’s actually cheaper and just as healthy. Not everyone has access to a CSA or a farmer’s market, so making organics stretch is a big deal.
Let’s take a look at the easiest, most reliable produce to use for kitchen scrap gardening. I promise you that you don’t need a green thumb or a lot of space to turn yourself into a scrap gardening pro.

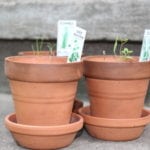
Getting started on a kitchen scrap garden
I did say it was going to be easy and that you didn’t need a green thumb, but you should walk through these tips before you start. It will help you avoid some simply mistakes and ultimately save you time. It’s the ultimate gardening on a budget!
Not every plant will be as bulky as a romaine lettuce, but glass Mason jars or containers with stone/glass/ceramic bases help minimize tipping over accidents. Clear glass vases, jars, and bowls are probably best and ensure you can see the quality of the water and root health.
Keeping fresh water in with your plant avoids stinky stagnant water from attracting pests. It also ensures healthier roots and in turn, a healthier plant. Committing to changing the water every other day also ensures the water level will never get low enough to hurt the plant. Finally, you don’t need half the plant submerged in water – just enough to cover the roots, about an inch or less.
Soil VS Water
While many plants on this list can be regrown in just water, some do just as well if not better in soil, and some will have to be transplanted to soil at some point to reach their full potential. Don’t be scared to have a space for your kitchen garden to grow, whether they’re in water or dirt.
You also don’t necessarily need fertilizer, but it can help improve growth and flavor in some plants. The good news is that hydroponic fertilizers are widely available, either locally from hydroponics shops or from places like Amazon.
A lot of these can also be grown completely indoors, so you don’t have to worry as much about keeping slugs away from your garden!
The best plants to regrow from scraps
Not every single plant can be regrown from scraps – or at least, not every plant can be regrown in a way that’s easy enough to warrant trying. The ones on this list are those I’ve found the easiest and most reliable to regrow in my kitchen, and your mileage may vary, but they should all be simple enough for anyone to have good results.
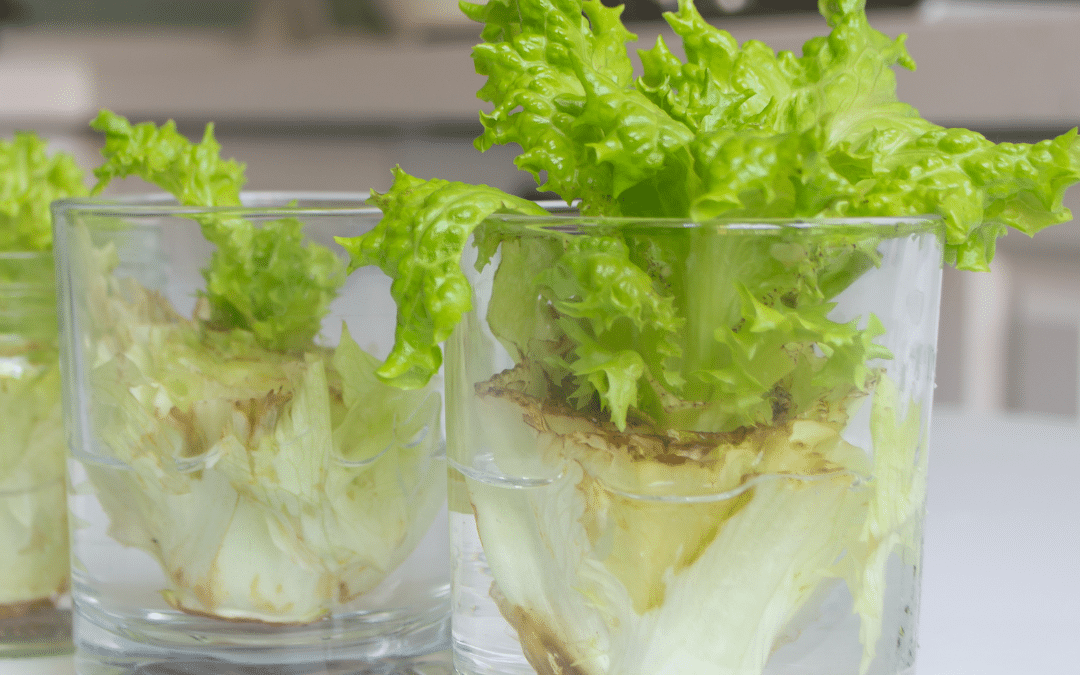
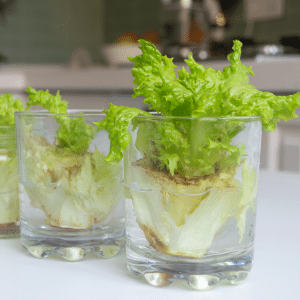
Lettuce
Leaf varieties of lettuce can be harvested down to almost the soil, and they will regrow the leaves repeatedly throughout the season. Green and red leaf lettuce is the best for this, as the leaves regrow quickly for multiple harvests.
Romaine lettuce can be cut so that the final 1/3 of the plant including the base is left, and that can be placed in water or soil to regrow the leaves. Within 3-4 days, the leaves will start growing from the center out and you can harvest it again within about 3 weeks.
Green Onion or chives
Green onions are extremely easy to regrow from the roots. Simply leave the roots and an inch of the white bottoms and place them in a container with enough water to keep them at least half submerged. They’ll start growing the green tops back in just a few days, and once they’re big enough, you can cut what you need for food and leave the roots to regrow.
The one issue with this method is that the future green onions will often not have as potent flavor as they did originally. The good news is that you can easily regrow them in soil by burying the whites and roots. They’ll regrow the green shoot and well-fed soil will help them maintain their flavor longer and more powerfully.
Garlic
There’s argument to be made that it’s better to buy actual garlic “seeds” vs using store-bought but you certainly don’t have to. The only issue with growing store-bought garlic is that you don’t know exactly what you’re getting and the variety you’re planting may not be best for your climate. That said, growing garlic is pretty easy! Pull apart a bulb, leaving as much of the paper covering intact as possible. Each clove will form a new bulb. Plant these in the Fall and they’ll be ready to harvest next Spring!
Growing Potatoes
There’s nothing special when it comes to growing potatoes! Potatoes are notorious for “growing eyes” or sprouts if you don’t use them quickly enough. While you can usually just cut these eyes off and cook them just fine, you can also take the opportunity to grow yourself some new potatoes. This is not something you can reasonably do on your counter, so you will need at least some outside space, just to be clear.
To start, cut the sections of potatoes with eyes into 2-inch chunks and let them sit on the counter or a window sill for a day to dry out and callous over.
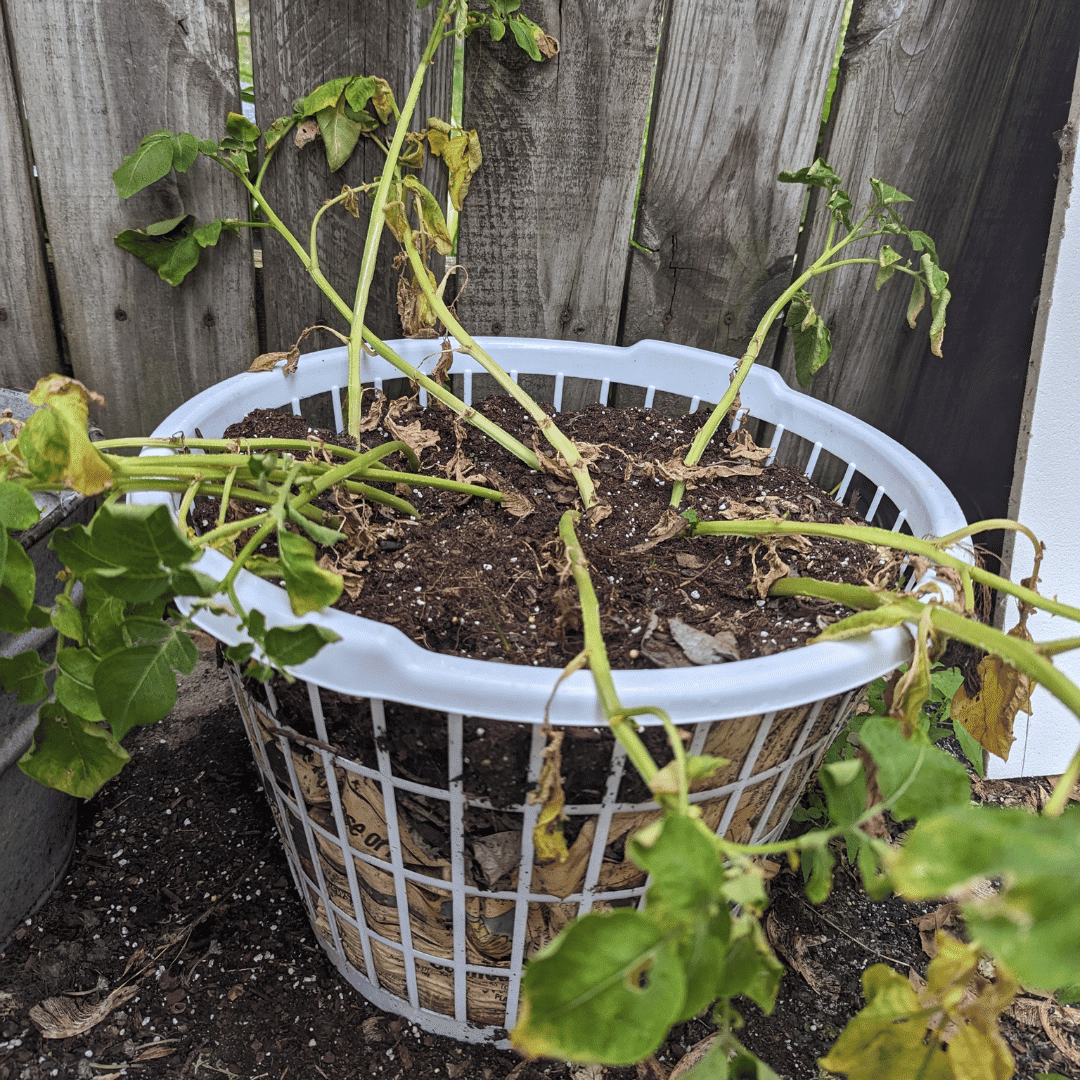
Next, take a large container – we used Dollar Tree clothes baskets – and line the inside with newspaper to ensure no soil spills out. Then dump in some potting soil and put your potato sections about 4-6 inches deep and wait. The “eyes” will grow into stalks that breach the soil in about 4 days and they’ll look like any other potato plant in 7-10 days.
As the vines grow on the surface, you want to cover them again with soil until only the leaves are showing. This is a process called “hilling” and it encourages the roots of the potato (which are what we are eating when we eat potatoes) to grow deeper and get bigger. Every time you start seeing those vines getting around 6-8 inches, add another layer of soil so that only the leaves are exposed.
After 3 months, as long as everything goes right, you’ll be able to harvest new potatoes! You’ll know it’s time to harvest when the plant looks like it’s dying:
I’d recommend you keep at least one, let it get eyes, and start the process all over again to continue enjoying free potatoes.
How to Grow Sweet Potatoes
Sweet potatoes will grow eyes like other varieties of potatoes, but the way to regrow these is actually a bit different. Cut a sweet potato in half (you can also use a whole potato) and poke skewers or toothpicks into the sides so that it rests on the mouth of a glass jar, and fill the jar with water so it’s just covering the bottom of the potato. Within a few days, you’ll start to get roots, and after they’ve grown around 5 inches, you can do one of two things:
1 – Cut the roots off from the potato and put them in a bowl or small jar of water. This will force each root to grow a “slip”, which you will then plant in soil. Each of these slips will be a separate sweet potato plant
2 – Let the potato start growing slips, which are essentially the vines that will grow from the potato you’ve skewered. You can pluck these slips off at around 6-8 inches and, as above, plant in soil individually. Each slip will start to grow potatoes. As with other potatoes, it will take about 3-4 months to harvest sweet potatoes but they’re pretty low maintenance and they love hot weather, so they’re great to plant about a month after your last frost, and to harvest in the fall, usually around first frost or slightly earlier.
Celery
Okay I’ll admit it – I HATE celery. Literally give me another other vegetable but celery? NEVER.
That said, if regrowing celery is something you want to do for some wild reason, it’s actually extremely similar to regrowing romaine lettuce. Simply take the stocky base and put it in a shallow bowl and you’ll start having new growth from the center of the plant after about a week. While it will take a long time to get new stalks of celery, you can harvest these tender greens for powerful celery flavor, if you’re into that sort of thing…
Growing Tomatoes from Store Bought
Tomatoes are delicious and we go through a lot in our household. My daughter herself will clear a pint of cherry tomatoes every day if we let her (and why not?) Regardless, supplying your own tomatoes is a great way to save some money at the grocery store, and it’s as easy as saving your scraps from the next salad you make.
You can ferment your tomato seeds before planting them – this can help improve successful germination – but it’s not necessary. If you simply scoop out the seeds from your next tomato and rinse them off, you can put them directly into soil and wait for them to germinate. To double-up on the recycling, use an old cardboard egg carton, and fill each cell with soil, putting a single seed in each. Spray the soil lightly with water and cover with plastic wrap, placing it in a warm space but not in direct sunlight. After a few days to a week, you should see seedlings, and you can remove the plastic wrap.
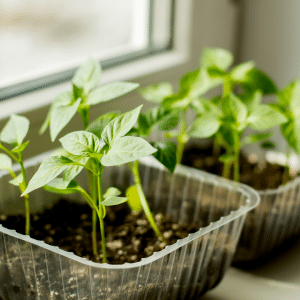
Tomato Seedlings
Start placing your seedlings in direct sunlight for a few hours a day, and give them water when they’re dry. As they get bigger, you can move them to individual containers – plastic drink cups are good. When they’re getting too big for the cups, move them into gallon or bigger planters and they should be fine to grow in there. The nice thing about tomatoes is that they don’t need to be put directly into the ground – they grow just fine in planters. This allows for even balconies in apartment buildings to be a small tomato garden.
One little hack to improve tomato yields is to stress the plants by adding herbs or some other smaller plant to the pot they’re growing in. This forces the tomatoes to push energy into making fruit rather than growing endlessly larger. I like to grow leftover basil in my tomato planters; bruschetta anyone? And tomatoes will keep producing throughout the summer and fall, so you can keep your kitchen stocked, just from saving a few seeds.
Growing Tropical Plants from Kitchen Scraps
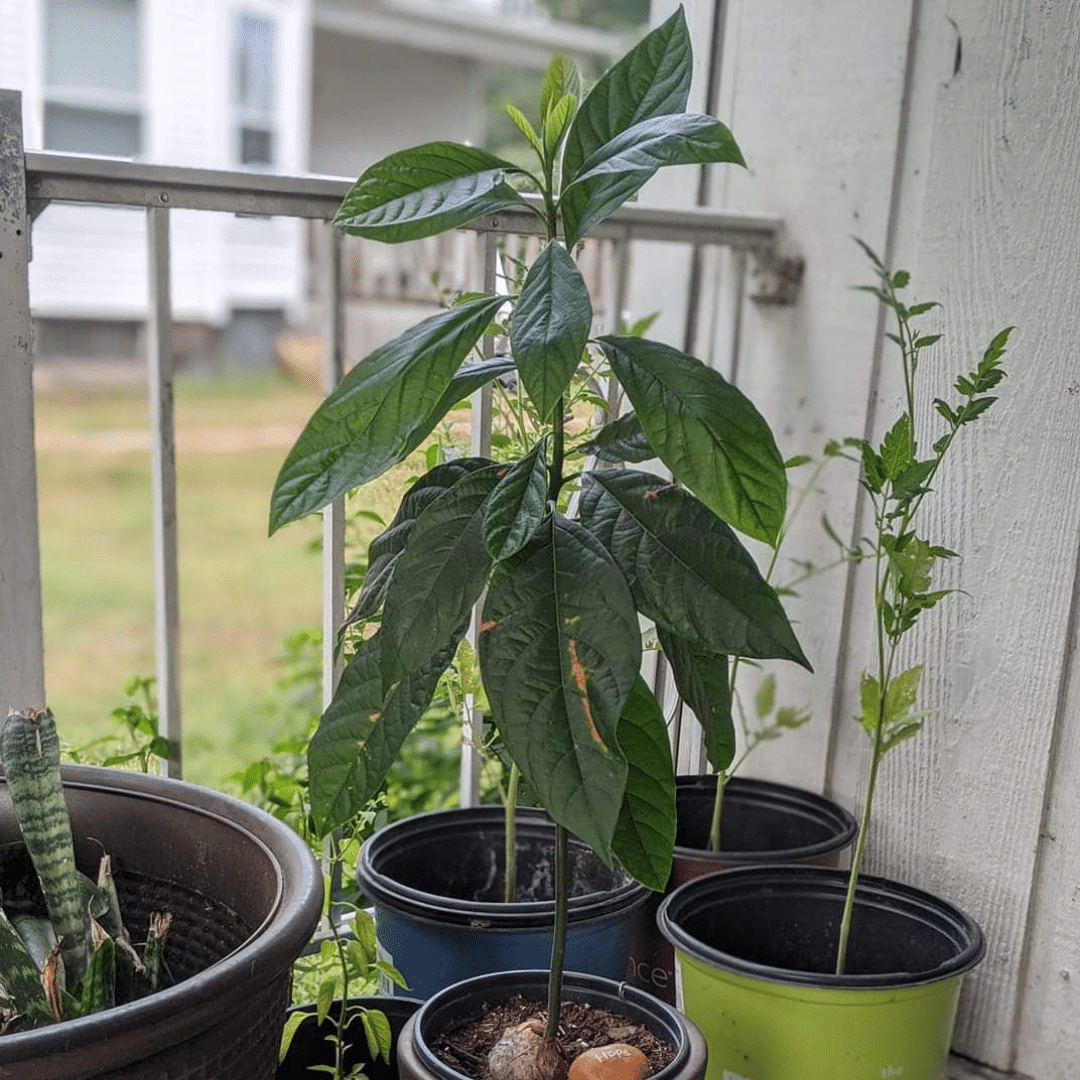
Next to my kids, my avocado plant is my pride and joy. I grew her from a pit at the very beginning of 2020, and she’s now a beautiful, healthy tall lady. I will admit, the journey was not without some peril and worry, but I was honestly surprised at how easy it was to at least start an avocado tree from a pit. I now have three and my friends often wonder if I’ve forgotten I live in Illinois. Oops!
When you eat your next avocado, remove the pit without cutting it or otherwise damaging the seed. Clean it off well and let it dry for a couple days before inserting 3-4 toothpicks around the sides about halfway up the sides of the pit. Next, fill a glass (I use shotglasses) with water and suspend the pit until it’s about halfway submerged in the water. Place it in a warm spot but not in direct sunlight and make sure the water stays level and clean as you wait for the seed to sprout. I recommend changing the water every other day.
Sprouting an Avocado
After about 4 weeks (but possibly as long as 10!), the pit should start growing a sprout on the top and roots out the bottom. Let it continue to grow until the sprout is about 9 inches tall and cut it back to 3 inches, just under a node. This will encourage the plant to make stronger and more numerous roots.
After the stalk of the sprout gets tall again, you can place the pit in a well-draining pot filled with soil. They grow relatively quickly, so as they gain 6-10 inches, it’s a good idea to prune them back to get them to grow outwards instead of just straight up.
You will need to transplant your avocado as it grows to encourage better growth and if you live in zones 10-12, you can plant it outdoors. It’s worth noting that avocado trees can get quite big depending on the species, so plan for that. It also takes a minimum of 5 years to produce fruit, and indoor plants are far less likely to ever produce.
Still, when I look up from my desk to see my beautiful, tall green avocado tree I started from a pit a few years ago, it fills me with a sense of pride and accomplishment (even if she never makes a single avocado).
Can you grow a lemon tree?
It might sound surprising but you can grow a lemon tree in almost any climate. It’s pretty easy to get the seeds to germinate but it’s best to use organic lemons if you can find them. Like most produce in grocery stores, some GMO lemons are engineered to not produce seeds or to produce seeds that won’t grow.
Simply take your lemon seeds and rinse off the pulp and plant them directly into healthy potting soil, about an inch deep. Keep them watered and at around 70 degrees minimum, and after a few weeks they should sprout.
As it outgrows its initial pot, you can transplant it into something larger. If you’re in zones 9 to 11, lemon trees can grow outside just fine. If you’re not, however, you can still grow them in a pot indoors and they can still produce fruit. Be warned, however – whether indoors in a pot or outside in the ground, lemons need well-draining soil. They also won’t produce lemons for a while; it typically takes at least 5 years but sometimes as many as 15 before you see any fruit. One they start to grow lemons, however, you will get healthy harvests going forward.
It’s really cool to have a lemon tree growing indoors so even if you can’t plant it outside, it does still provide a fun conversation piece for visitors. And once it starts producing fruit, you can brag about how life handed you lemons and you made lemonade every single time you use them.
Growing a Pineapple
So here’s a fun story: the first time I ever went mega-viral (2.5 million views and counting!) it was for talking about how to grow a pineapple.
Growing a pineapple is a lot easier than you might think. You only need a healthy, ripe pineapple where the leaves all look green and vibrant – avoid one where the leaves are browning, wilted, or starting to get dried out. Twist the top to separate it from the fruit, and then remove the first 1″ of leaves from the bottom (the part that attaches to the pineapple itself) until you’ve revealed the little bumps. These little bumps are where new roots will grow, so it’s important to make sure they’re exposed.
Next, leave the crown of the pineapple someplace to dry for about 2 days. This helps cure it and prevents disease and rot when you place it in water. It doesn’t always work, and it’s not always necessary, but it’s a painless extra step that can improve the odds of the pineapple rooting.

Planting Your Sprouted Pineapple
After a couple of days, the pineapple crown should be placed at the top of a jar or glass of water, so that the bottom and the nubs are submerged. Change the water every other day to prevent it from getting scummy and moldy. After a week or two you should start seeing roots form. Let these grow until they’re about 3-4 inches long – this can take as many as 6 weeks, so be patient!
Once the roots have formed and grown, place it in a pot with cacti soil mix and put it someplace warm with indirect sunlight. The roots will continue to grow over the next month or two, and you should start seeing new green growth of leaves in the center of the plant top. You can trim away brown, old leaves and it should continue to grow new leaves as long as it’s doing well. Keep the soil consistently moist without over-watering, and fertilize when necessary.
It can take a few years to fruit, and you will need to transplant your pineapple plant as it grows larger, but container pineapples are pretty good about fruiting. There are guides online to help you if after 3-4 years you’re seeing growth but no fruit. And if you live in a tropical climate where it doesn’t frost, you can transplant your pineapple directly into the ground. Either way, you should have fairly good success with growing pineapple from scraps.
Growing a Mango
Have you caught on yet that I’m a big fan of growing tropical plants from kitchen scraps? Mangoes are super fun and easy to grow (even in cooler climates!) I have a full video on this, but it’s fairly simple if you prefer to read.
Basically once you’ve eaten your mango, go ahead and gently use scissors to cut a small slit alongside the pit. It’s inside the pit that you’ll find the actual mango seed. Soak the seed in water for 24 hours then wrap in a damp paper towel and place in direct sunlight. Within just a few days, you’ll have roots! Plant this in some soil and within a few months, you’ll have your very own mango plant.

Growing Basil and other store-bought herbs
If you’ve ever bought a pot of fresh basil from the store and though how lovely it will be to have basil whenever you want, only to find it dying in a week, you’re not alone. It’s extremely common for those basil plants to look and smell amazing for a few days to a few weeks and then simply die. The reason is because those pots – in most cases – hold half a dozen plants or more. This is to make them look voluminous and healthy, but the reality is that they will quickly crowd each other out and die.
How to Keep Store Bought Basil From Dying
The good news is you can turn that one doomed pot of plants into multiple thriving basil plants with a little intervention, some soil, and a handful of pots. Simply remove the basil from the pot, and look where the plant stalks exit the soil and this will help you determine where each individual plant is. Simply break the dirt clod apart and pull those individual plants away from each other, and repot them in soil. It’s okay if you end up with two in each pot – it’s better than the 6 – 10 that you started with.
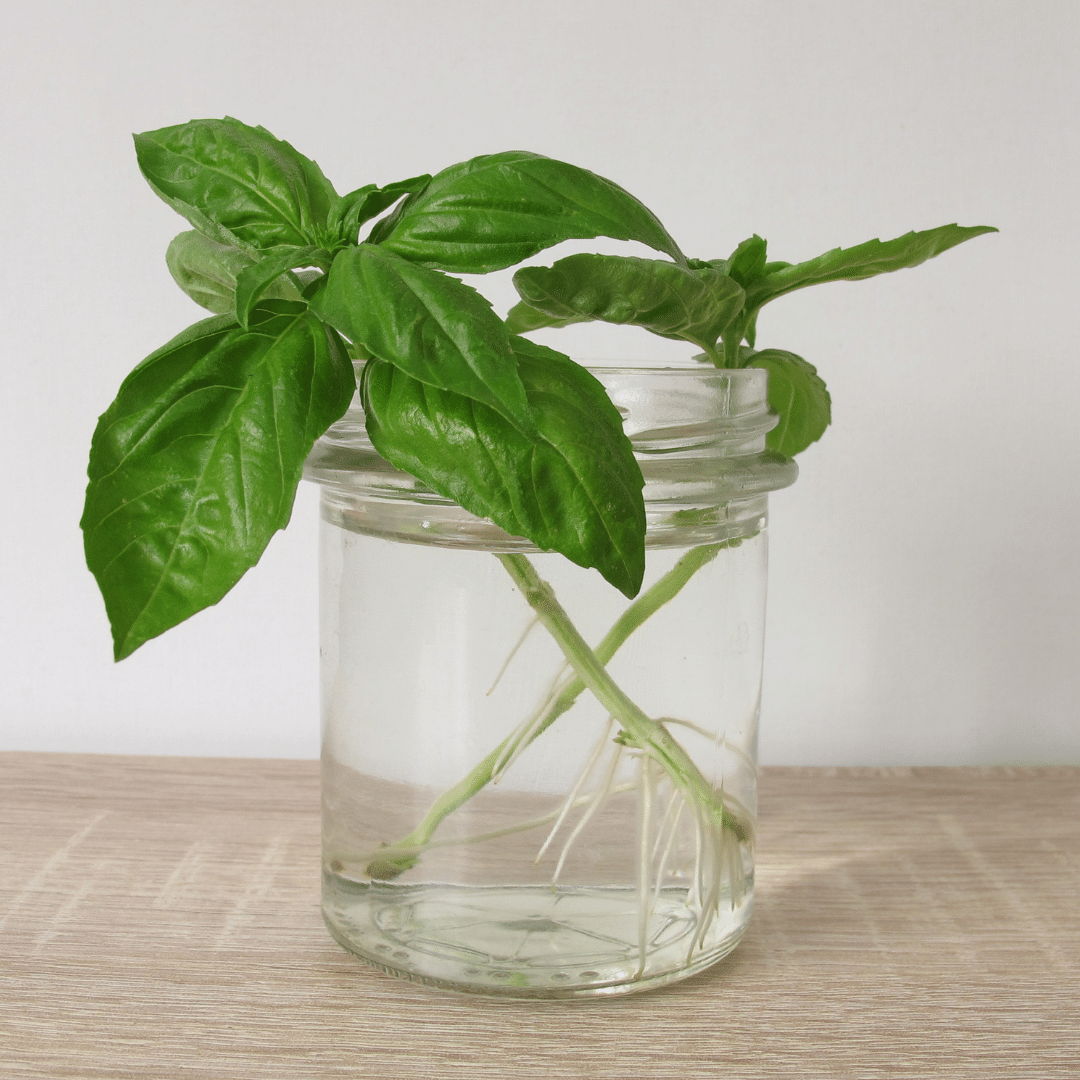
Another option is to cut off each basil stem at it’s node and drop it in water. Roots will form within a week and can then be transplanted into soil. Just make sure you keep the soil very moist as the new roots grow!
You will find these plants will do much better in most cases, and you can even give them away to friends and family. Who doesn’t love a beautiful, fresh basil plant on their counter? They might not all thrive, but they’ll certainly have a better chance than when you bought them from the supermarket.
Growing Other Store-Bought Herbs
Not every herb is as packed in as basil is, either, so if you get cilantro, dill, or other potted herbs from your supermarket, you can keep them on your counter for continued use as well. Sage and mint grow quickly and spread widely, so they take to outdoor planting very well. Just keep in mind that they can be somewhat invasive, and they will almost certainly regrow each year on their own with little intervention needed from you.
It’s also a good idea to ensure that you pinch the tops of the plants before they flower in order to maintain the best flavor. And as the growing season ends, if you have more than you know what to do with, harvest it all and dehydrate it in your oven at 200 degrees for a few hours. This will help you have delicious herby flavor all year long, and mint can be used for tea, which is great for an upset stomach or a calming, non-caffeinated alternative to black or green teas.
Don’t toss your kitchen scraps
Whether you’re growing tomatoes from leftover seeds, basil from unused stalks, or romaine from the bottoms of your last salad, you can save money doing some scrap gardening. Not only can you get some additional use out of your food waste, you prevent it from ending up in a landfill! Additionally, there’s something extremely satisfying about getting multiple meals worth of food out of a single grocery buy, especially for organic produce that can be pretty pricey.
If you don’t have good luck with your first attempts, don’t get discouraged. The good thing about kitchen scrap gardening is that if you don’t succeed, nothing was really wasted – it would have went into the bin anyway. The next time you make dinner, try again!